In the world of cloud computing, AWS VPC (Virtual Private Cloud) is your passport to creating your own isolated piece of the cloud. Imagine you're building your digital town, complete with houses (resources) and neighborhoods (subnets). AWS VPC lets you control who gets to visit and who stays out, ensuring your resources are secure and organized.
By using AWS VPC, you gain:
- Security: You can set up virtual gates, like security guards, controlling who enters your digital town. This prevents unauthorized access to your resources.
- Isolation: Just as each neighborhood in a real town has its own character, you can create separate subnets for different purposes, keeping your web servers, databases, and other services in their own safe spaces.
- Customization: Like choosing paint colors for your houses, you get to decide on IP addresses, routing rules, and network settings tailored to your needs.
AWS VPC is your playground in the cloud. It's where you design, build, and manage your networked resources. Here's a quick look at the key components:
- Subnets: Think of these as neighborhoods within your town. Public subnets face the main road (the internet), while private subnets are tucked away. A subnet is a range of IP addresses in your VPC.
- Internet Gateway: Just like a main road leading to your town, it connects your VPC to the world wide web. An Internet Gateway allows your instances to access the internet.
- NAT Gateway: This is the secret passage for your private houses (resources) to access the internet without exposing themselves. A Network Address Translation (NAT) Gateway allows instances in private subnets to connect to the internet.
- Security Groups: These are like vigilant security guards stationed at each house's door. They decide who's allowed to come in. Security groups act as a virtual firewall for your instances.
- Network ACLs: Consider these as community rules posted at the entrance of each neighborhood, controlling who can enter and exit. Network Access Control Lists (ACLs) are stateless and provide an added layer of security.
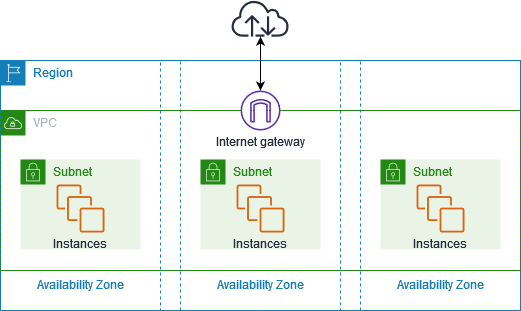
The following diagram shows an example VPC. The VPC has one subnet in each of the Availability Zones in the Region, EC2 instances in each subnet, and an internet gateway to allow communication between the resources in your VPC and the internet.
Creating your own AWS VPC is easier than you might think. Here's a simplified step-by-step guide:
-
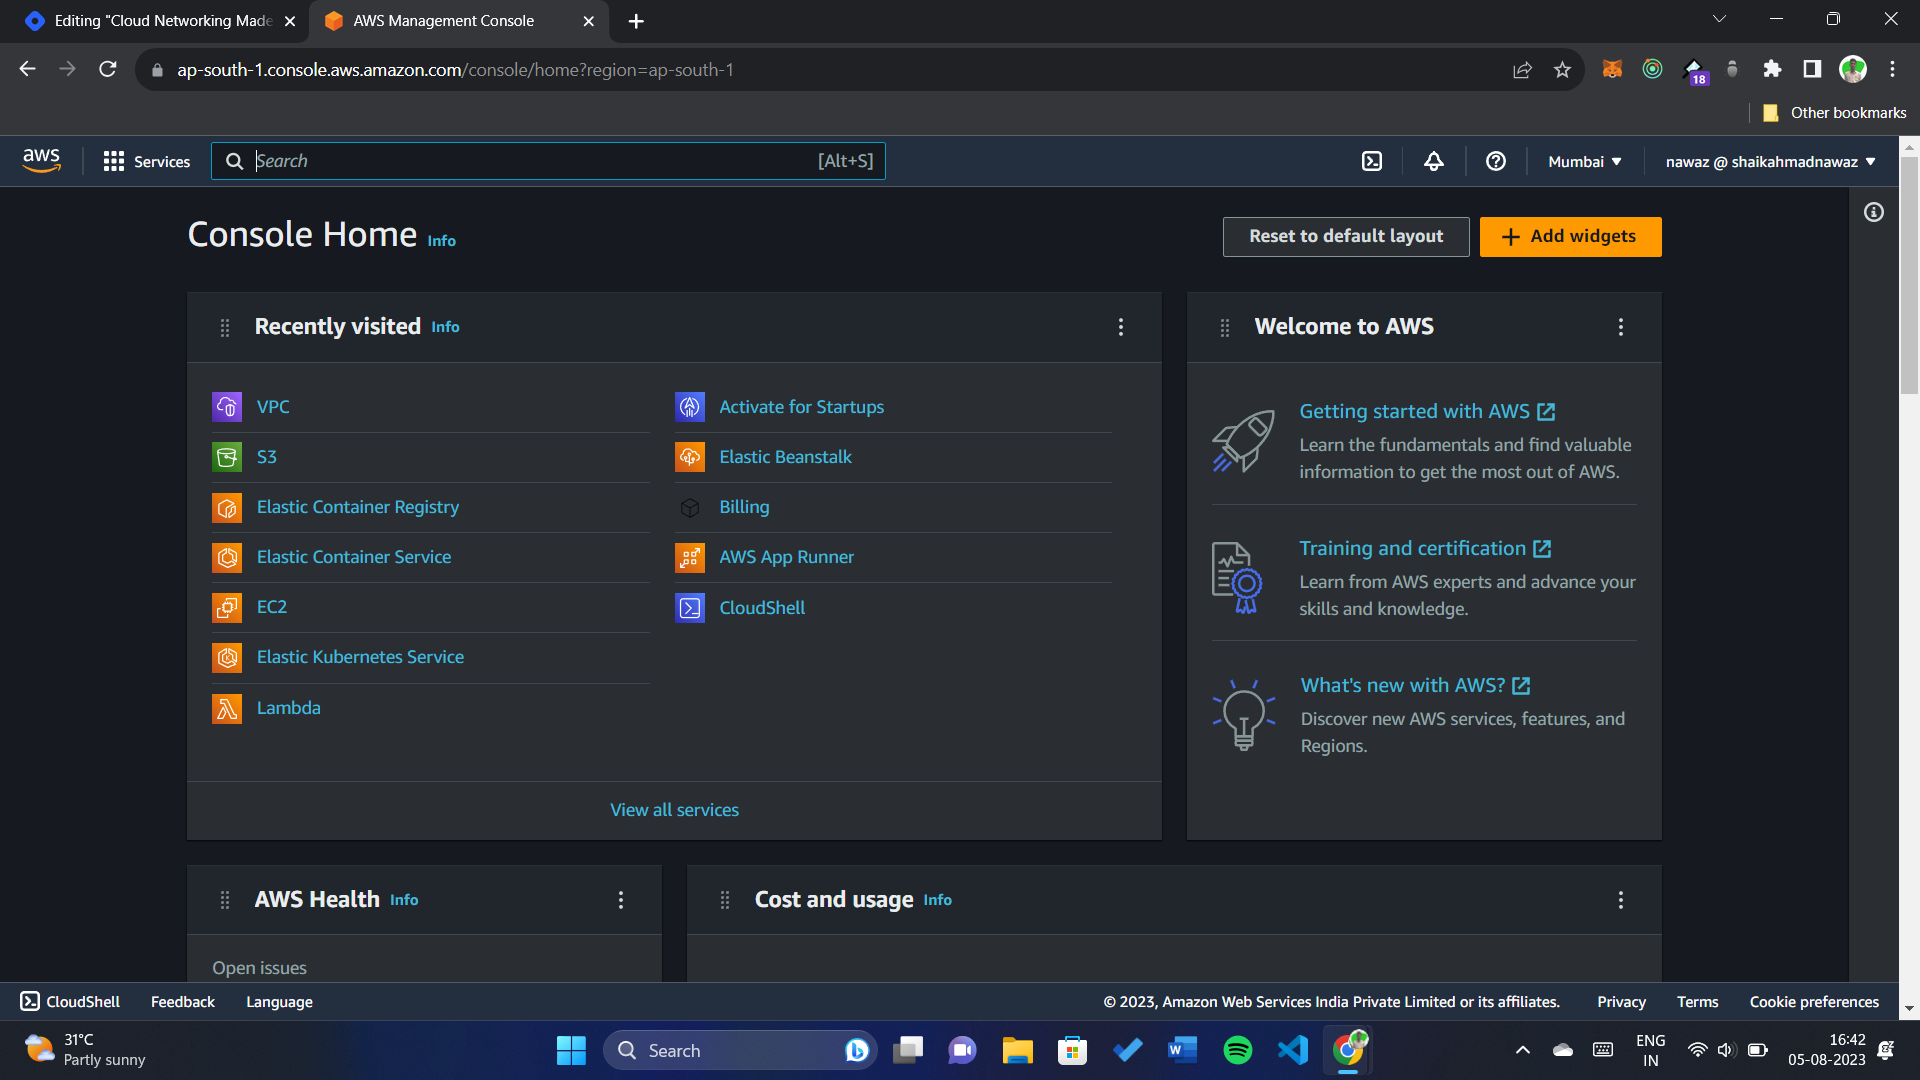
Navigate to the AWS Management Console: This is like finding the entrance to your cloud town.
-
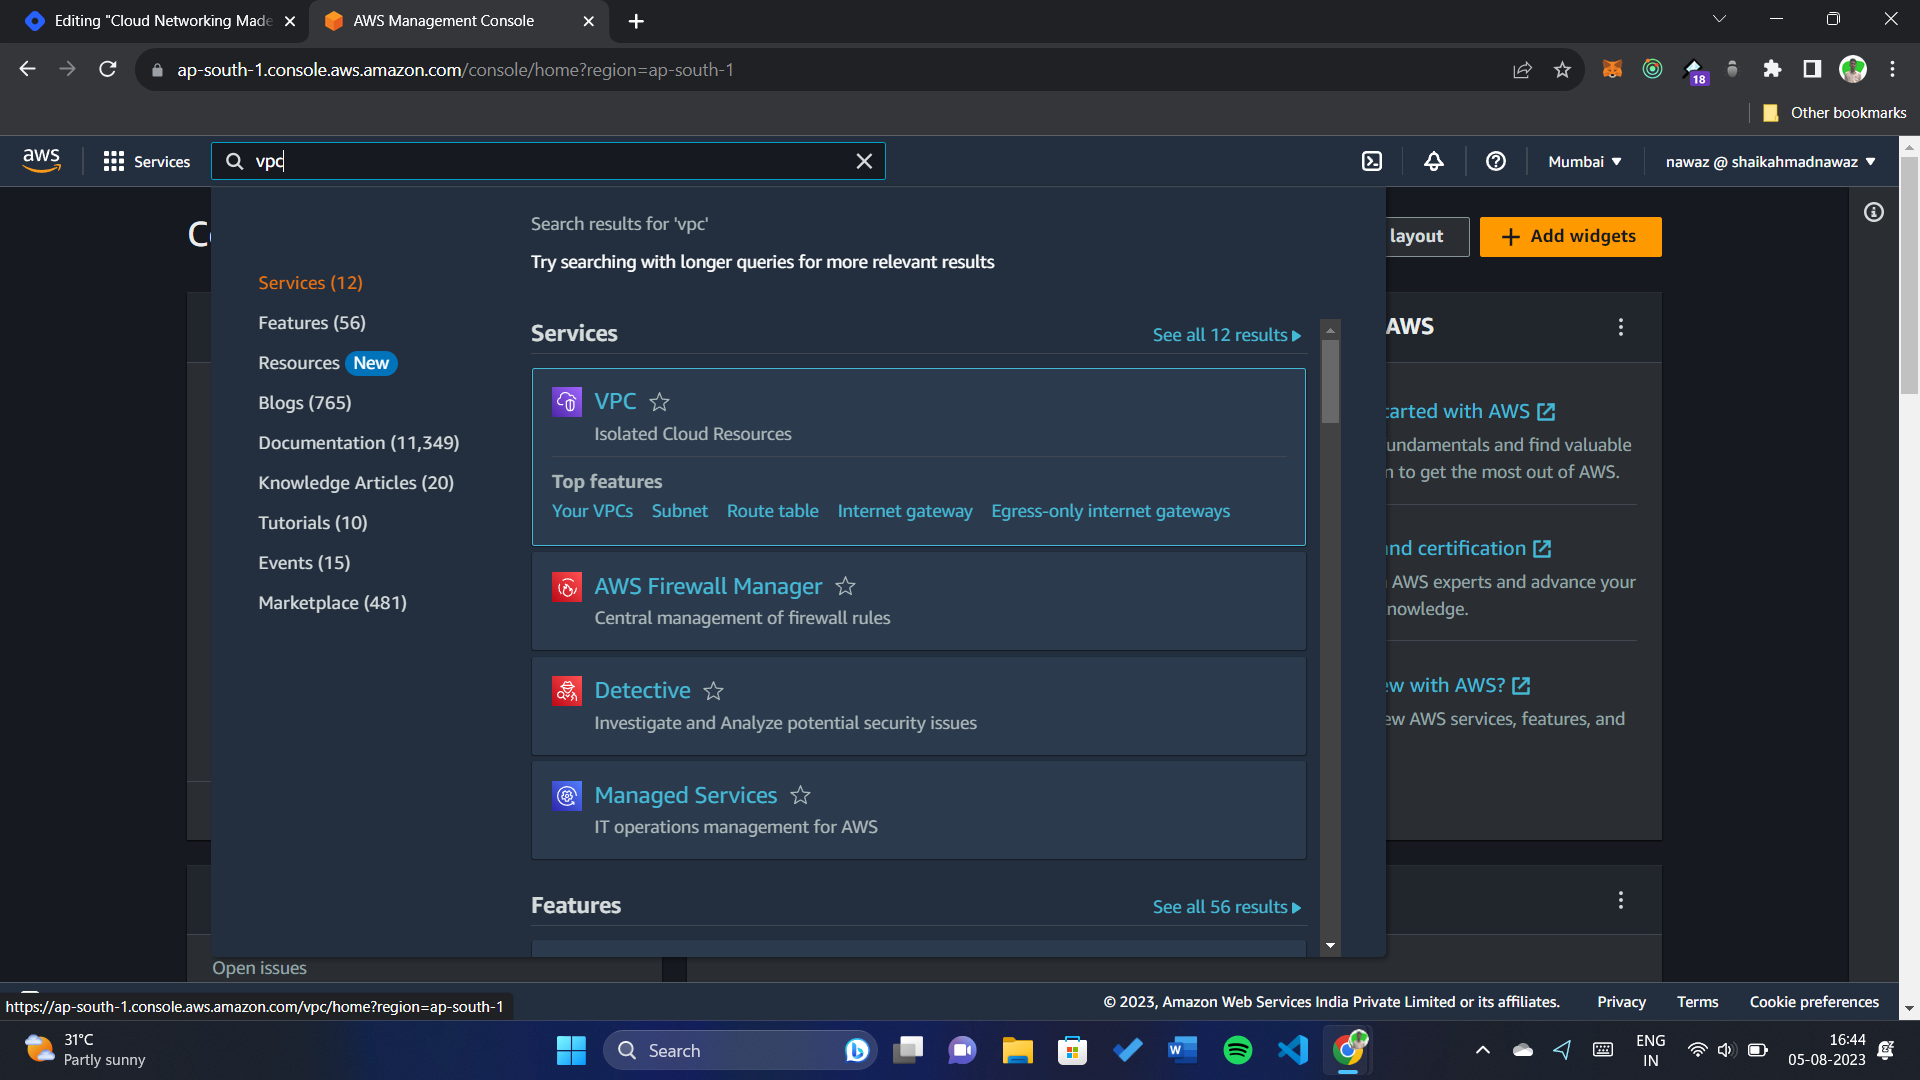
Choose "VPC" from the Services Menu: Think of this as reaching the town planning office.
-
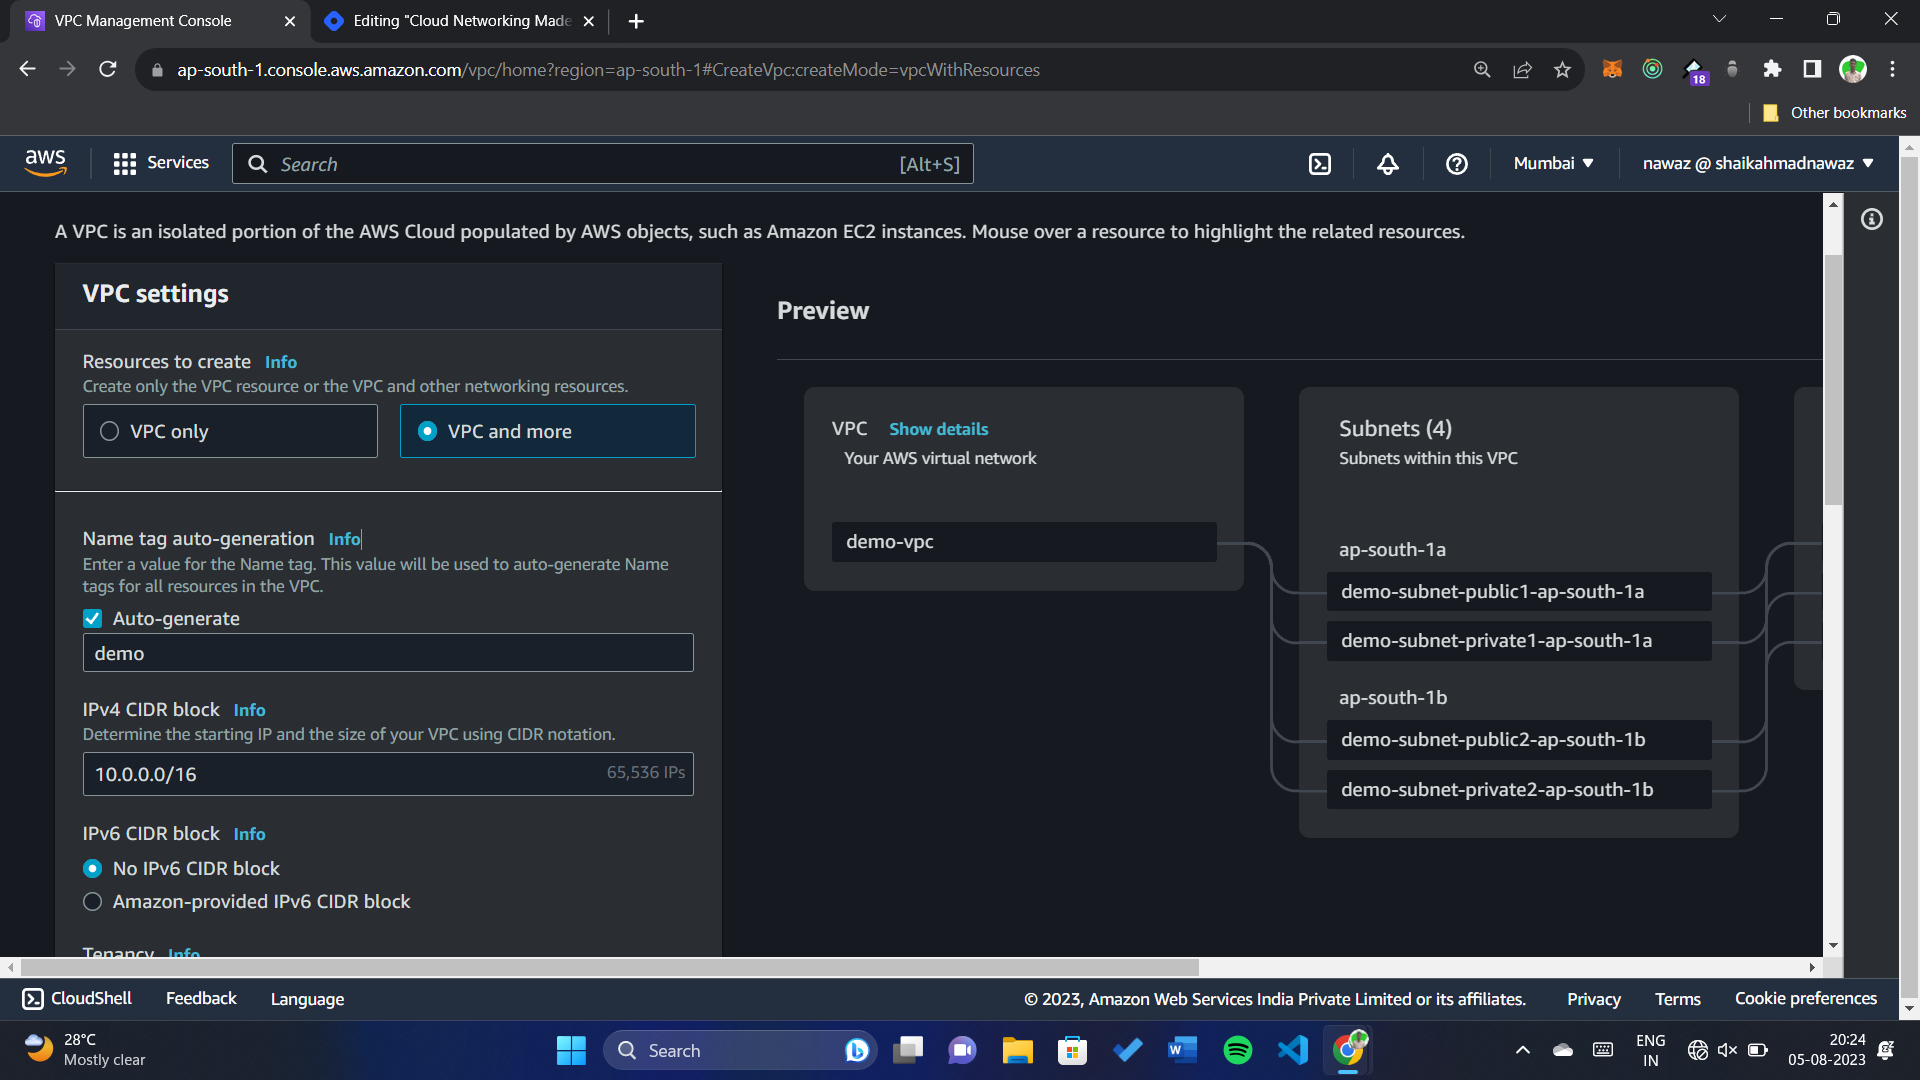
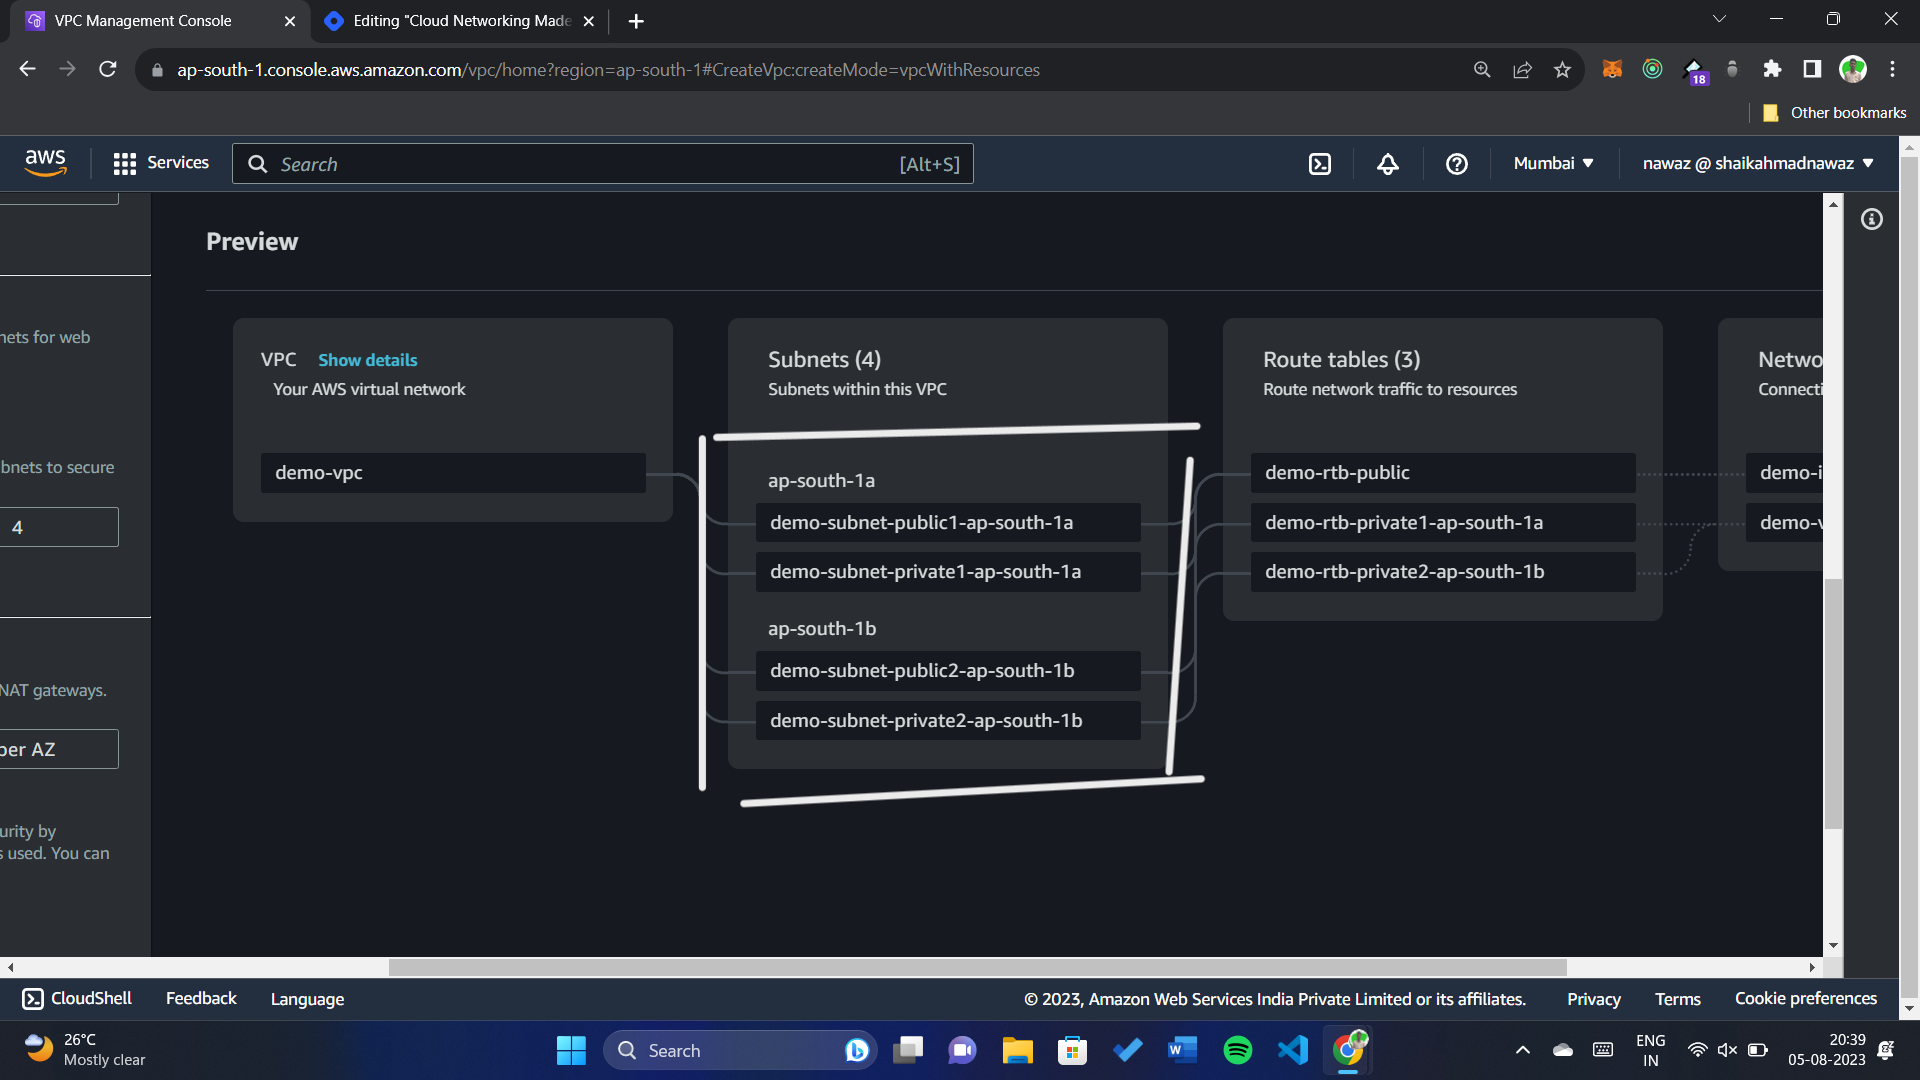
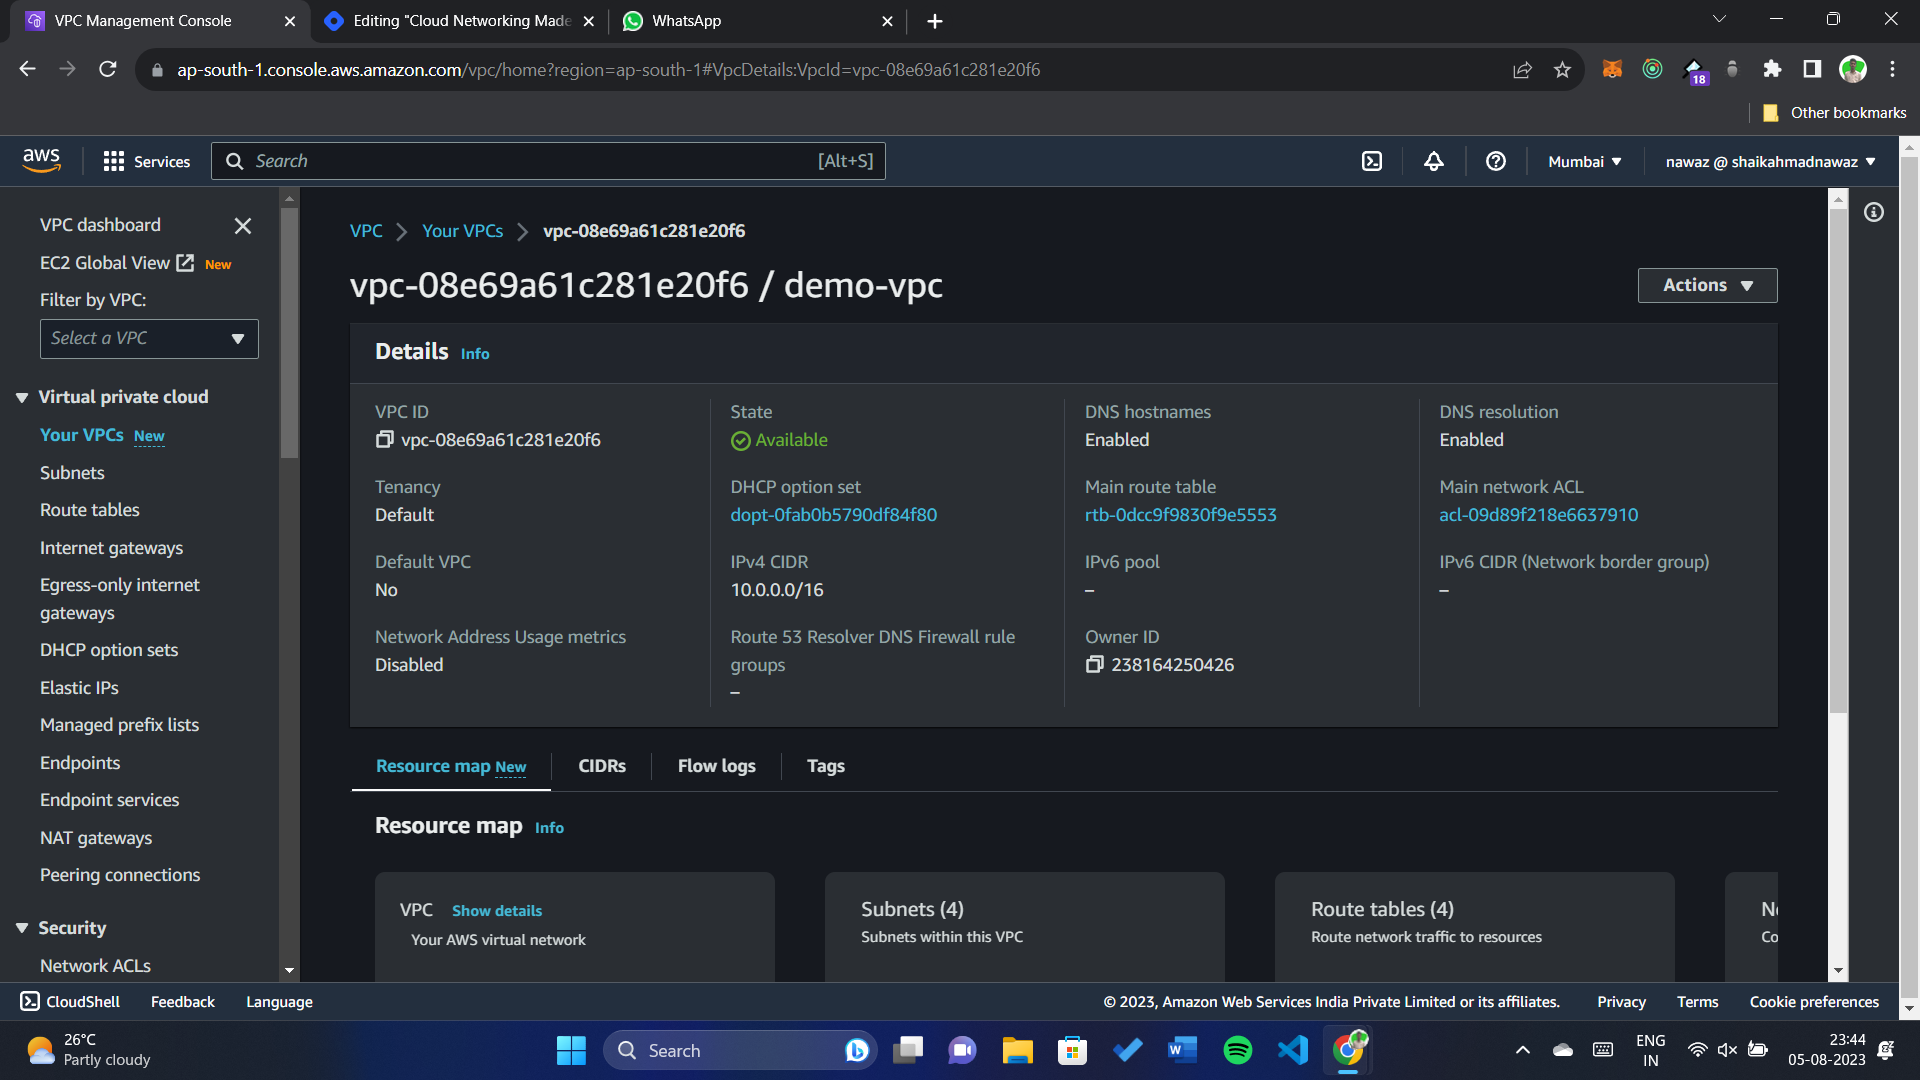
Click "Create VPC": This is where you name your town and set its address range (CIDR block).
-
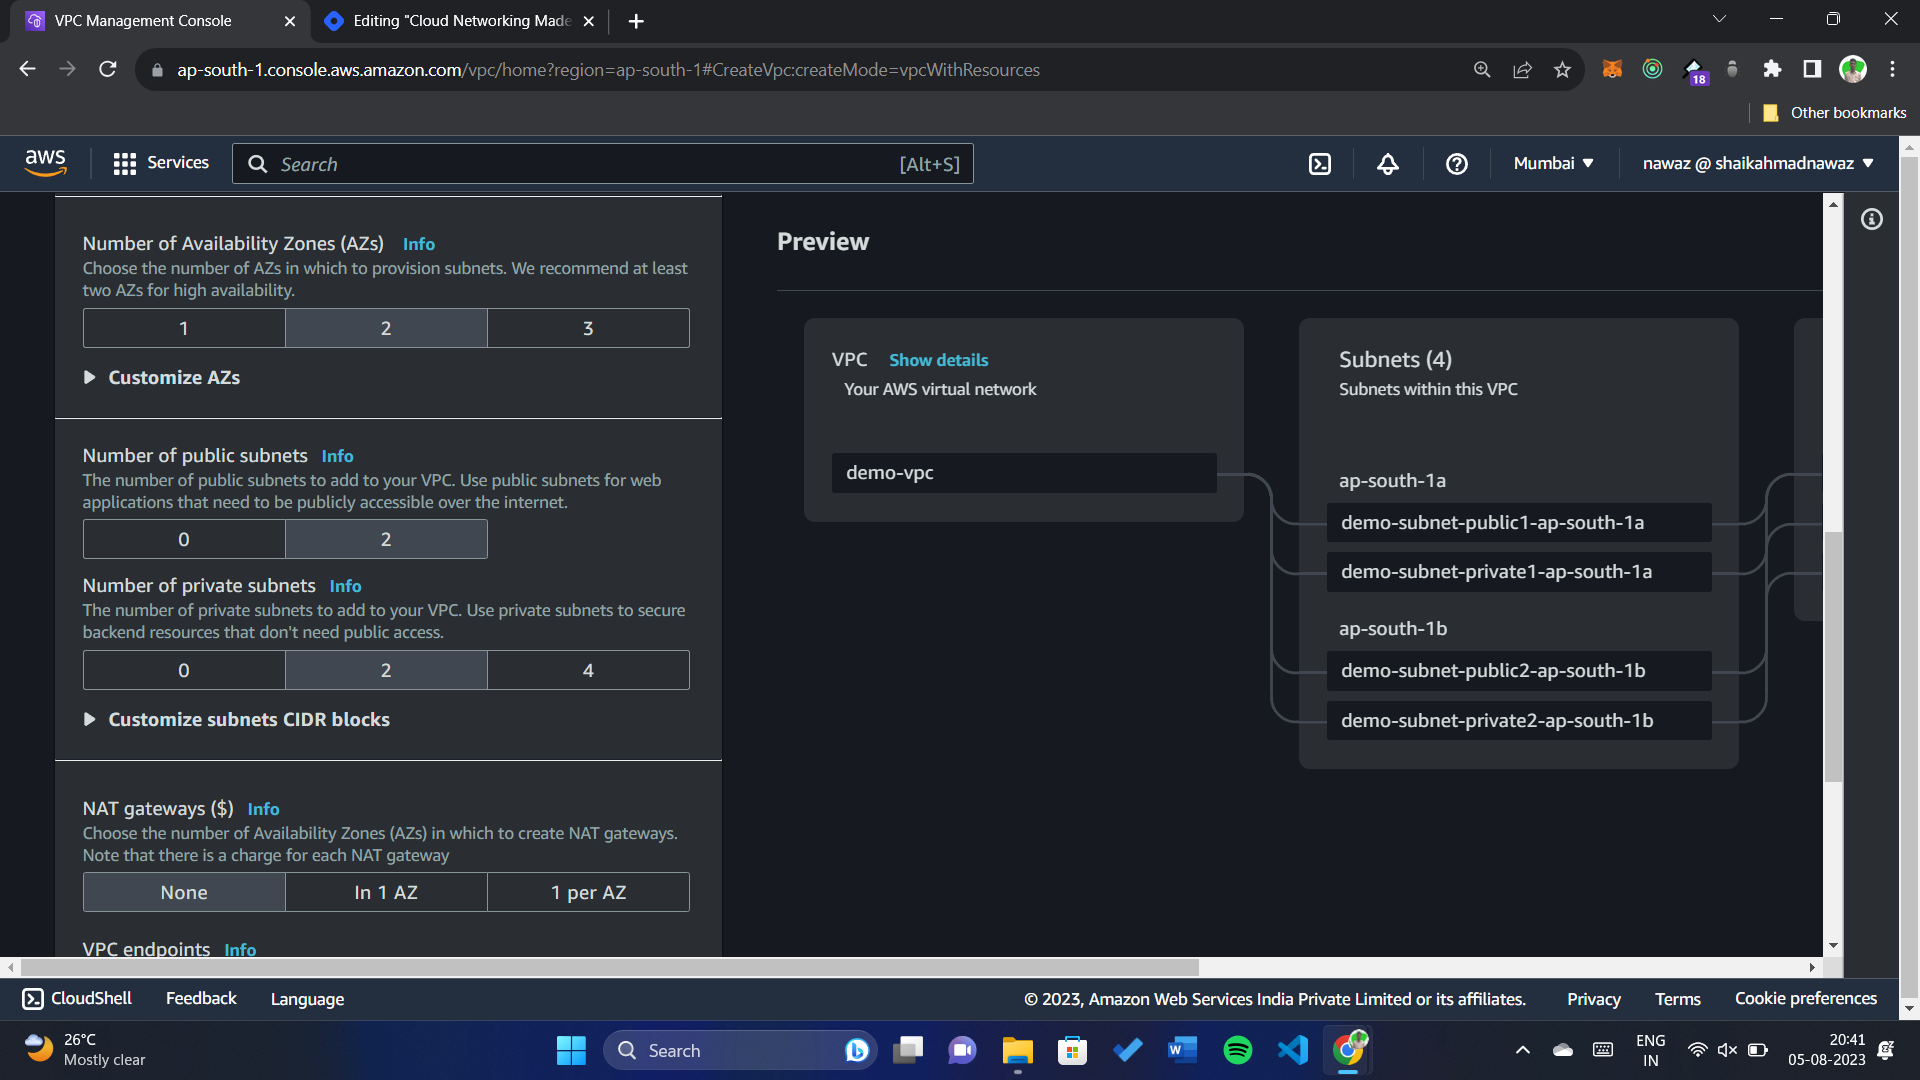
Create Subnets: Just like dividing your town into neighborhoods, create subnets for different purposes. Public ones can be used for resources that need direct internet access, while private ones are ideal for internal services.
-
Set Up Internet Gateway: Build the main road to the internet by creating an Internet Gateway and attaching it to your VPC.
-
Configure Route Tables: Think of these as street signs that tell traffic where to go. Direct public traffic to the internet gateway, and private traffic to a NAT gateway.
-
Security Groups and Network ACLs: Assign security guards (security groups) to each house and put up community rules (network ACLs) for the neighborhoods.
Launch Resources: Start building your houses (launch instances) in your chosen subnets. They will automatically follow the rules you've set.
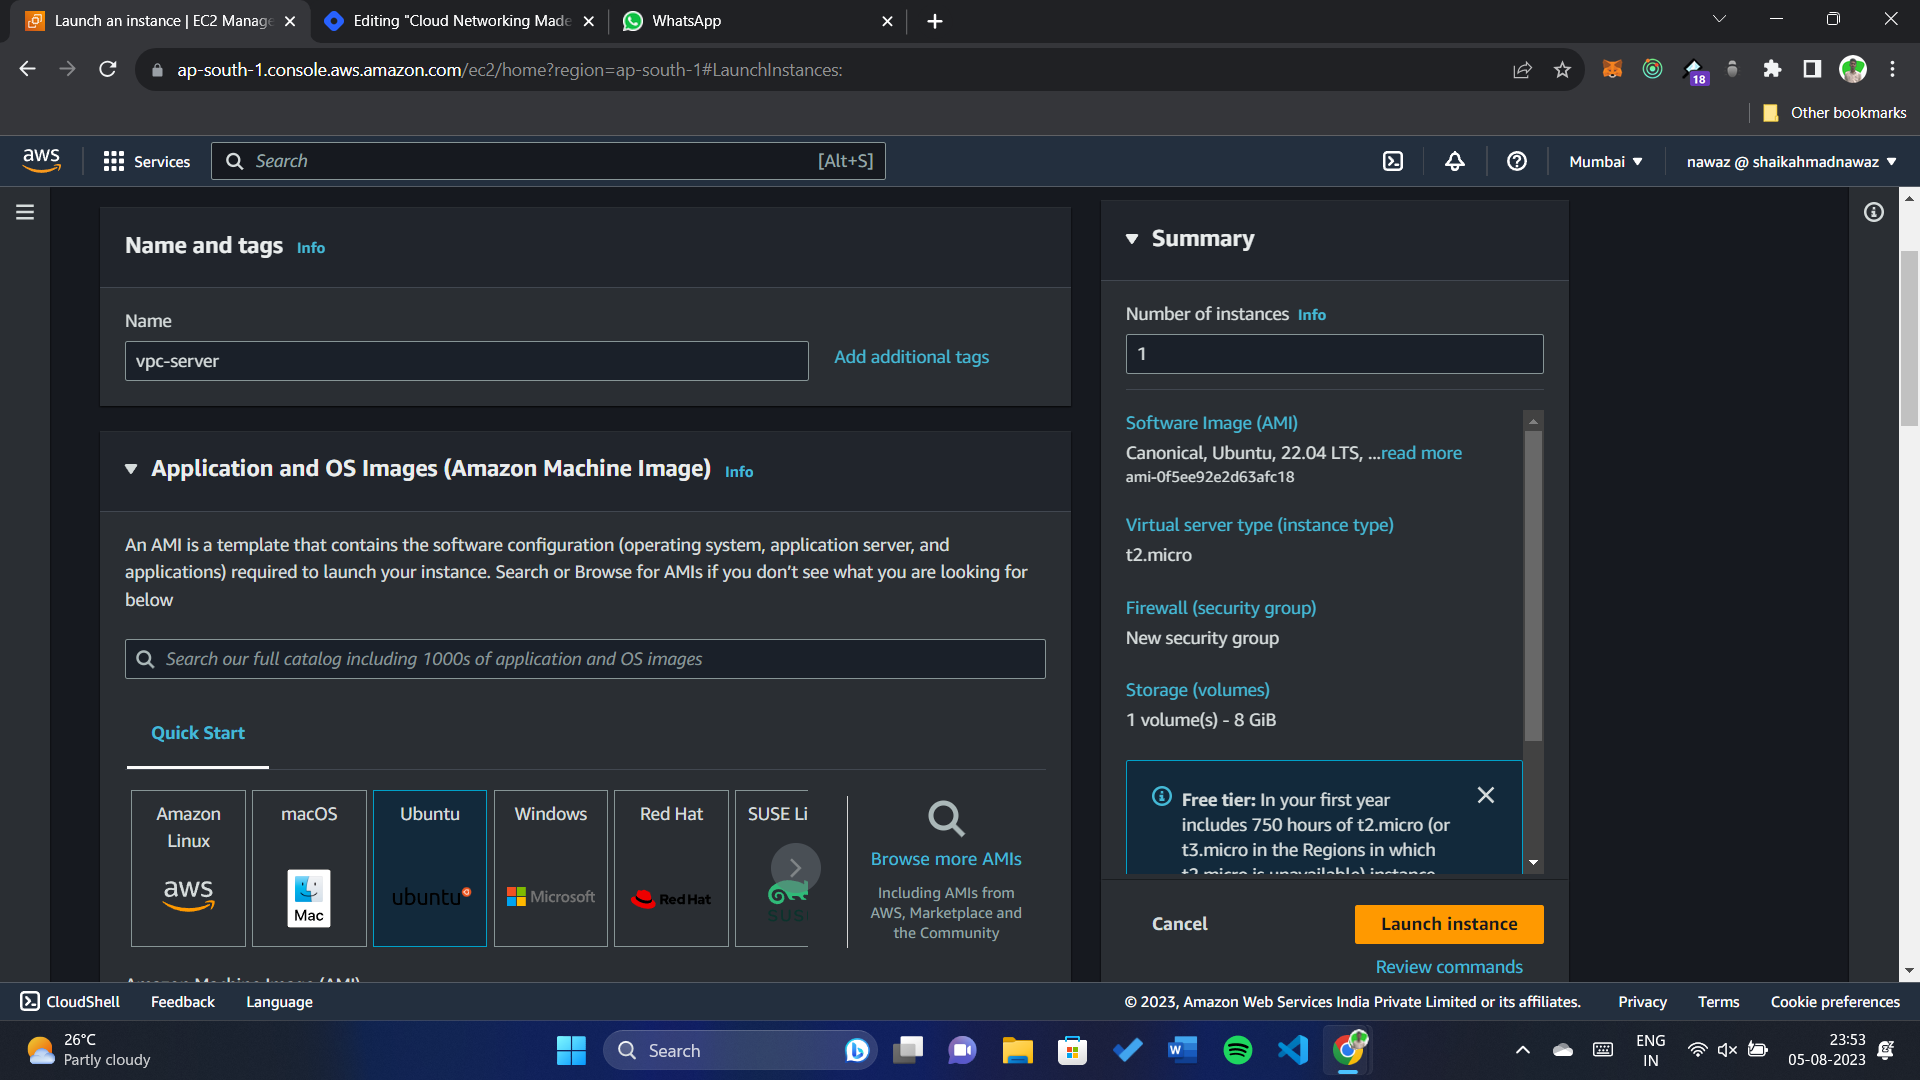
Now that you've built your town (AWS VPC) and set up its neighborhoods (subnets) and roads (gateways), it's time to add some houses (resources). Let's start by launching an EC2 instance, which is like constructing your first building.
-
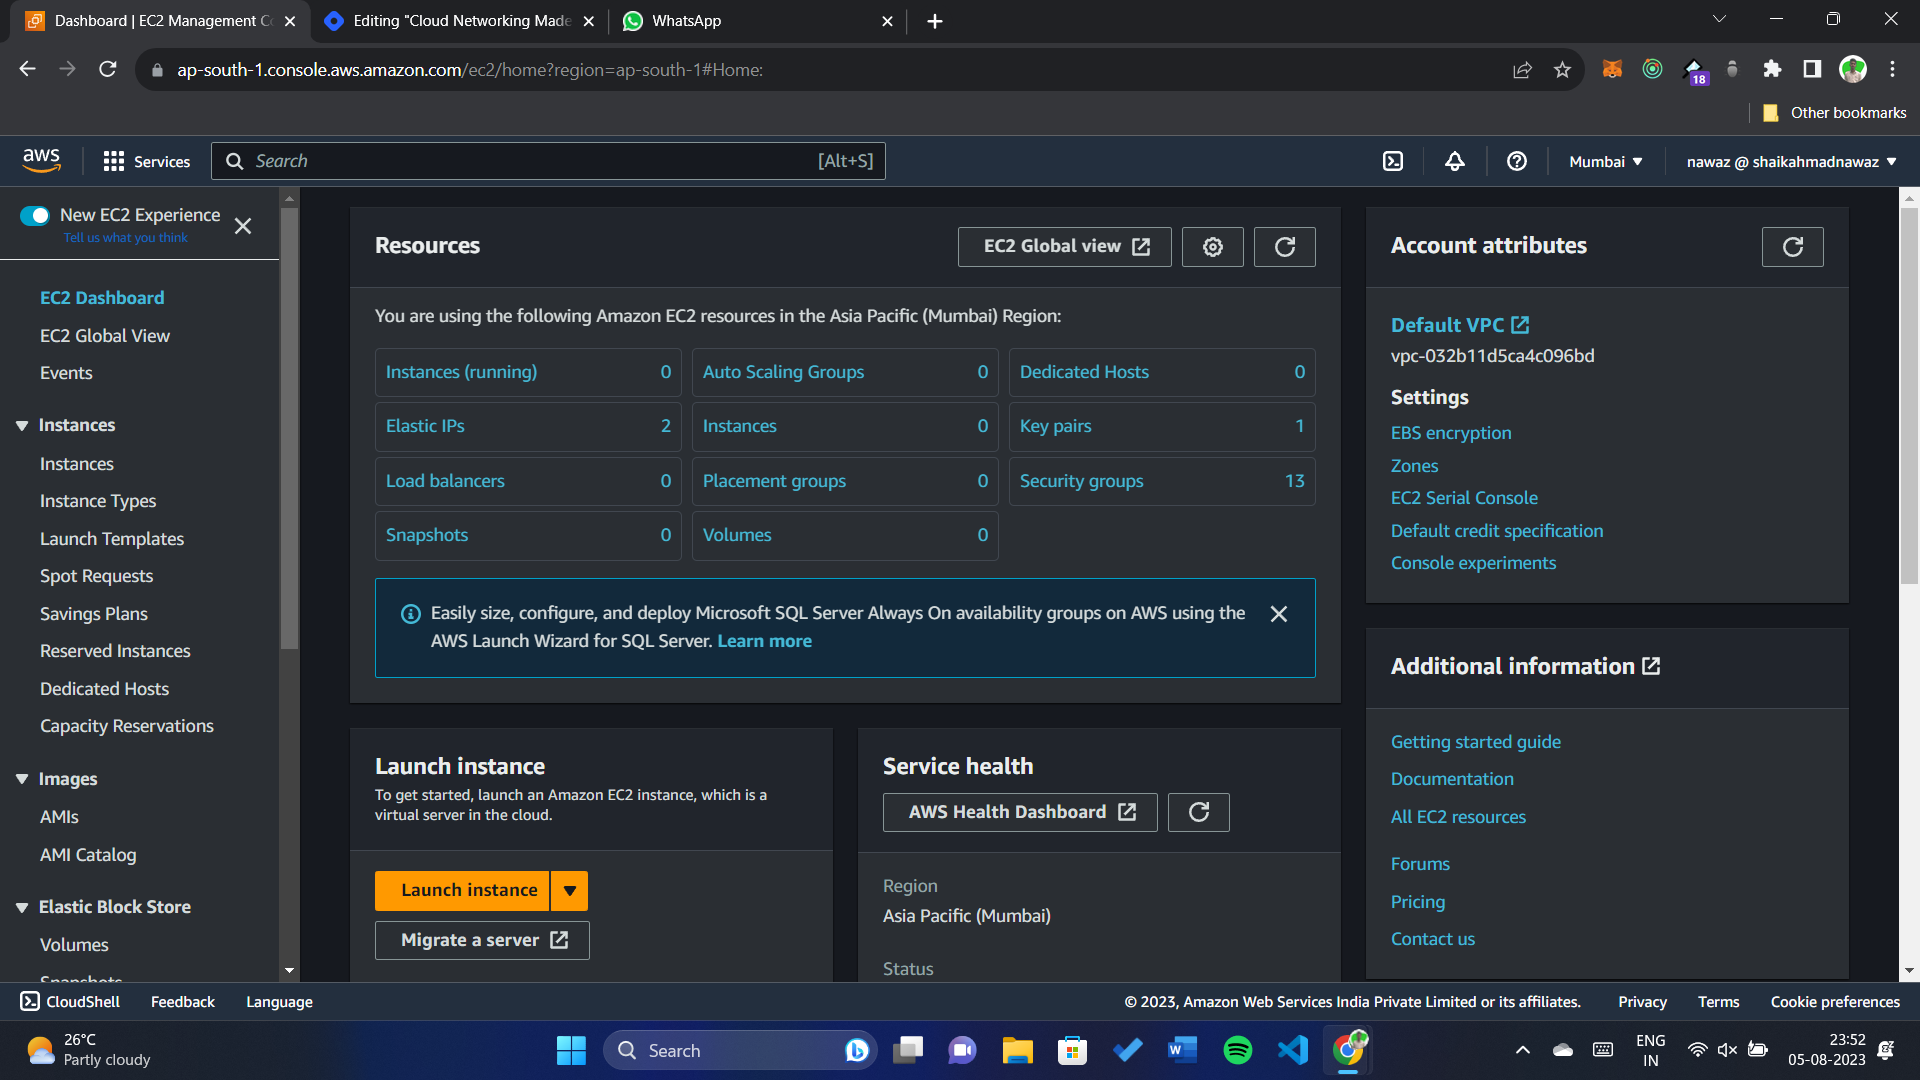
Navigate to EC2 Dashboard: Think of this as opening the blueprint for your house.
-
Launch an Instance: Click the "Launch Instance" button, which is equivalent to laying the foundation of your building.
-
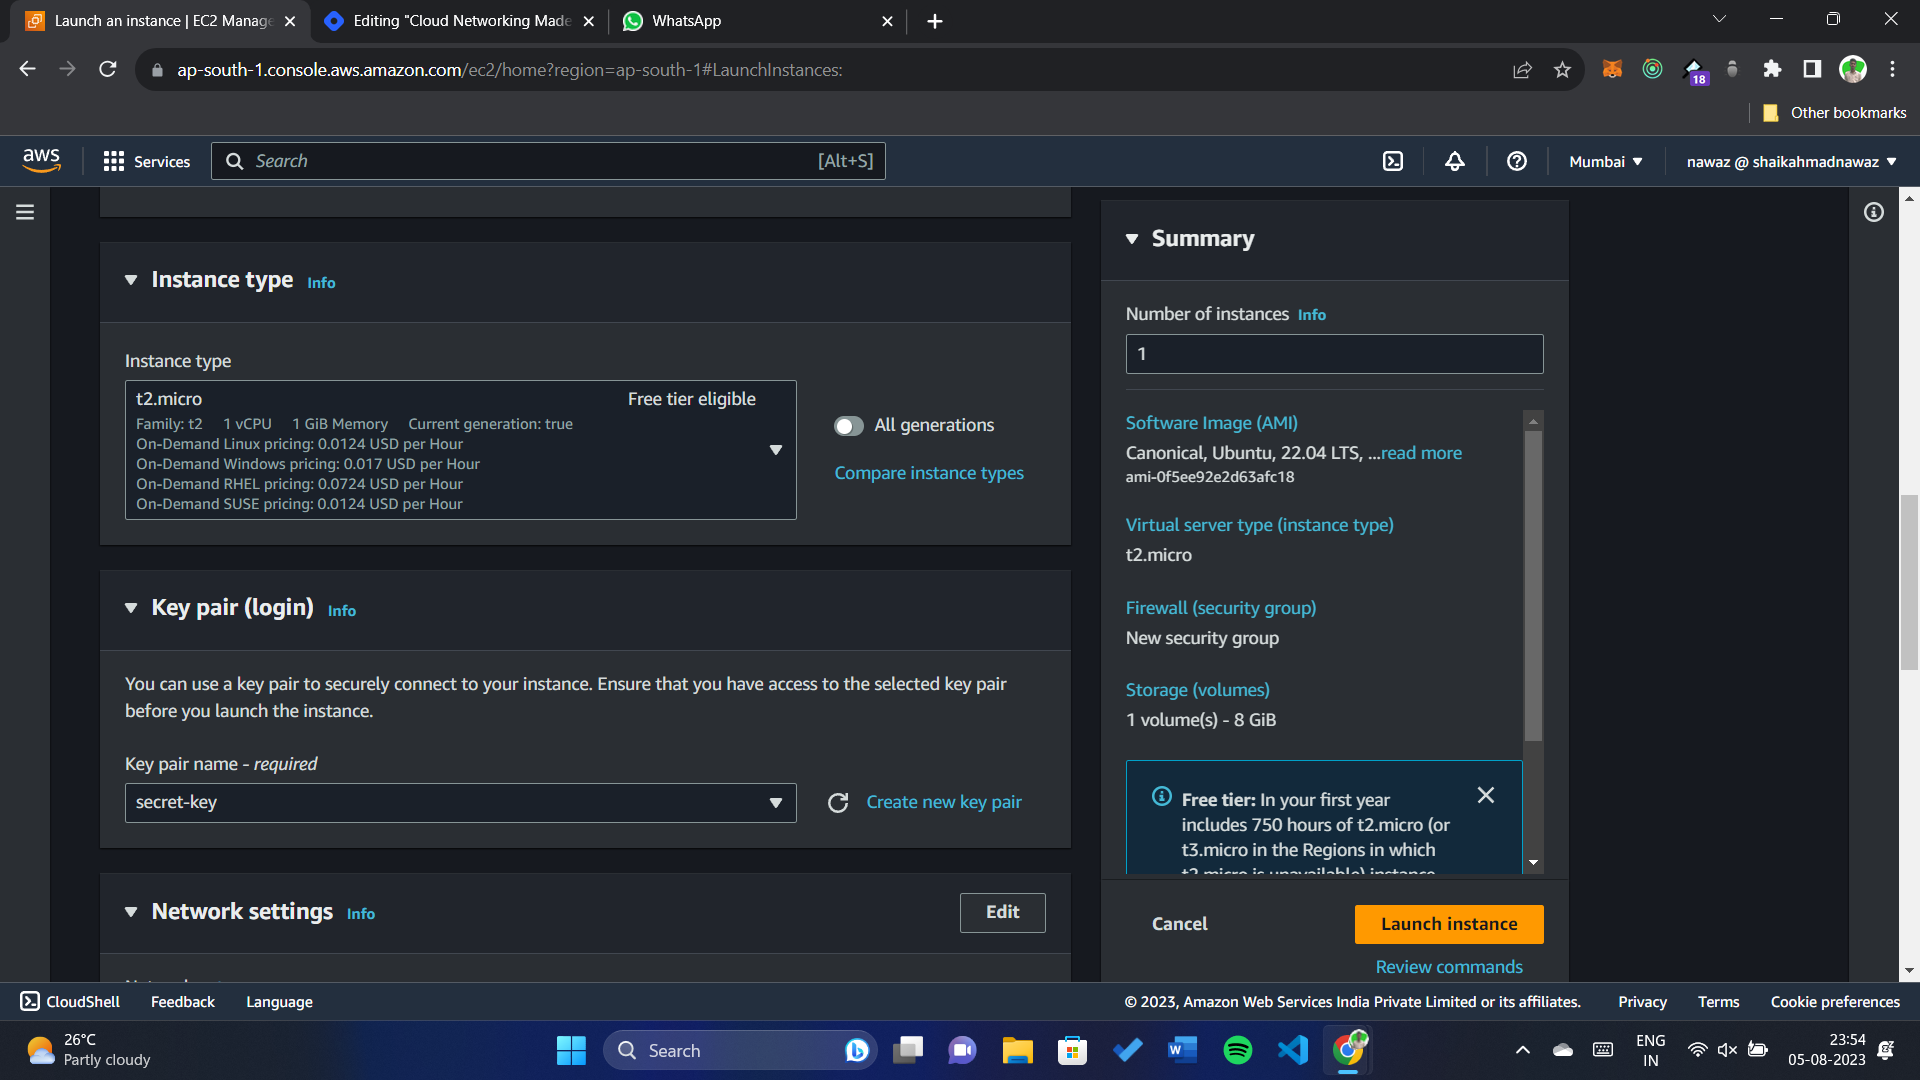
Choose an Amazon Machine Image (AMI): This is like selecting the design and style of your house. Choose an operating system that fits your needs.
-
Choose an Instance Type: Think of this as picking the size and layout of your house. Different instance types offer varying amounts of CPU, memory, and other resources.
-
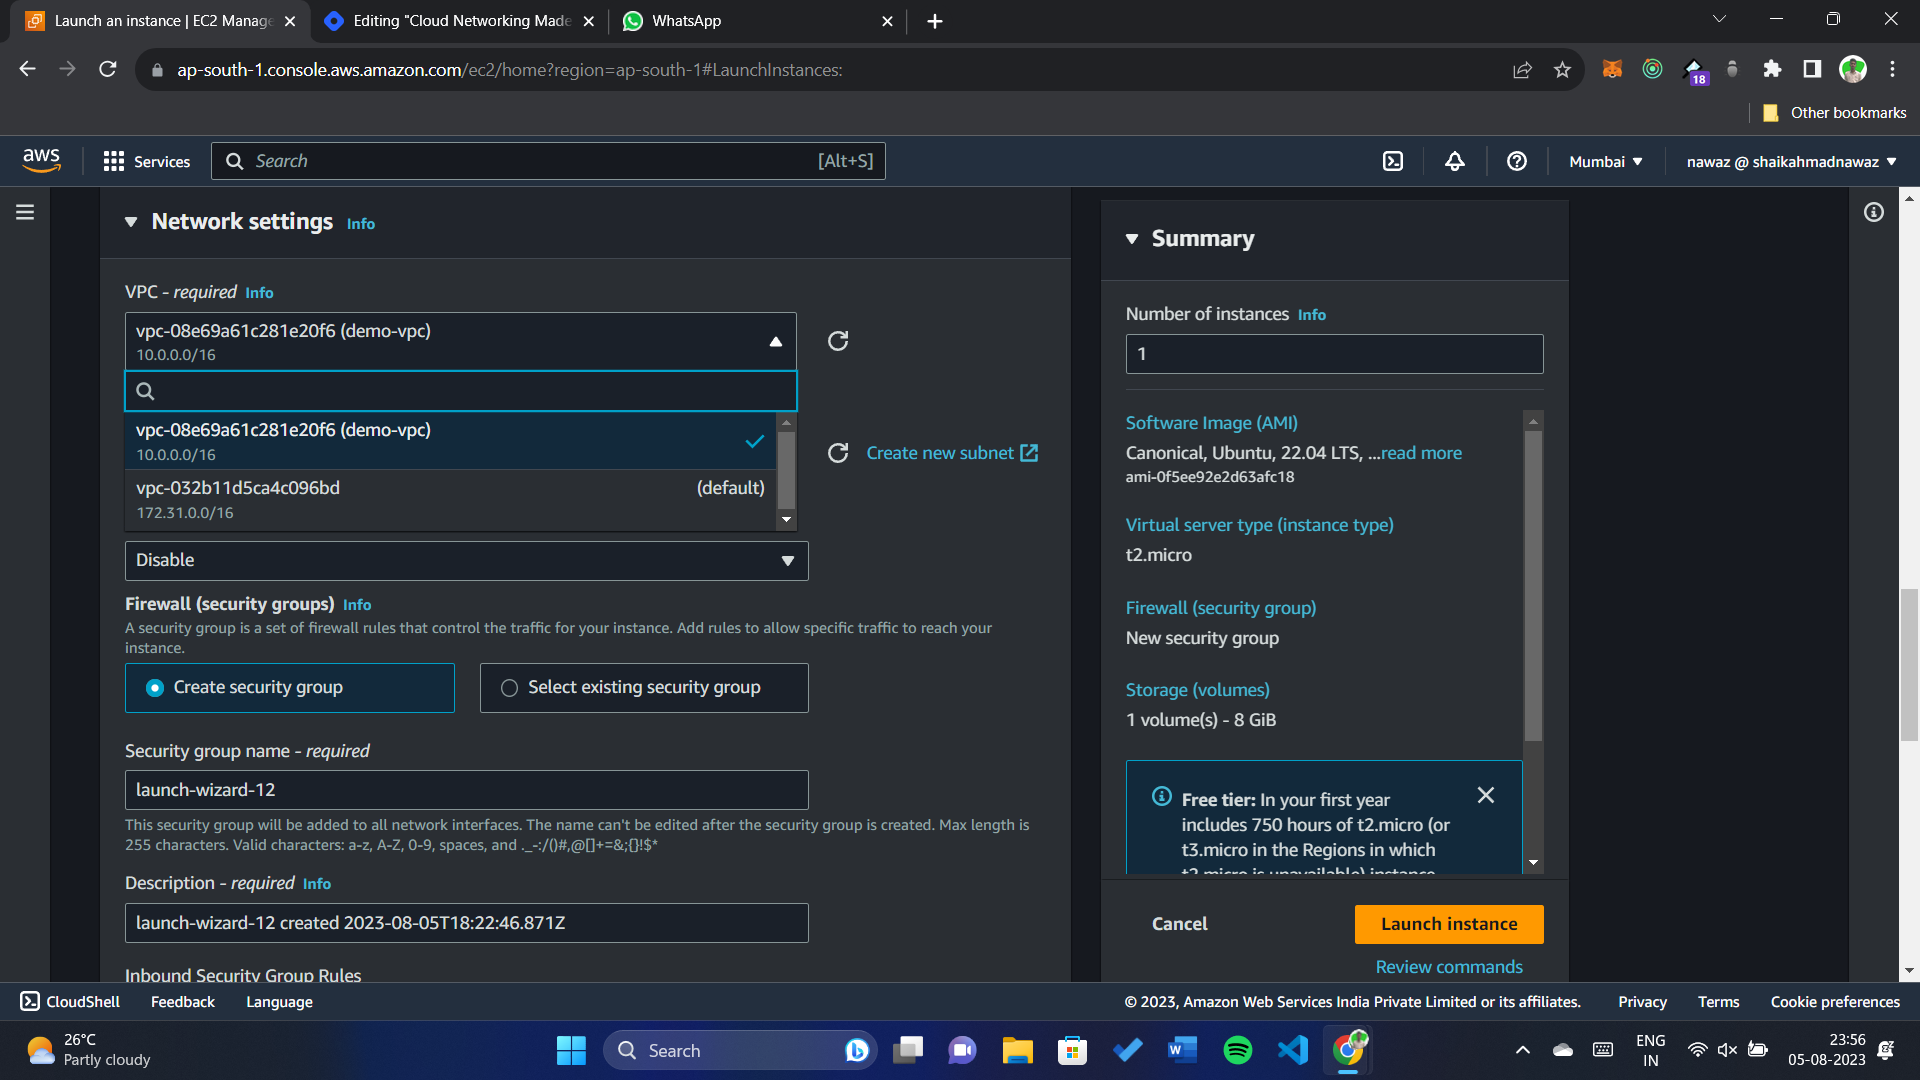
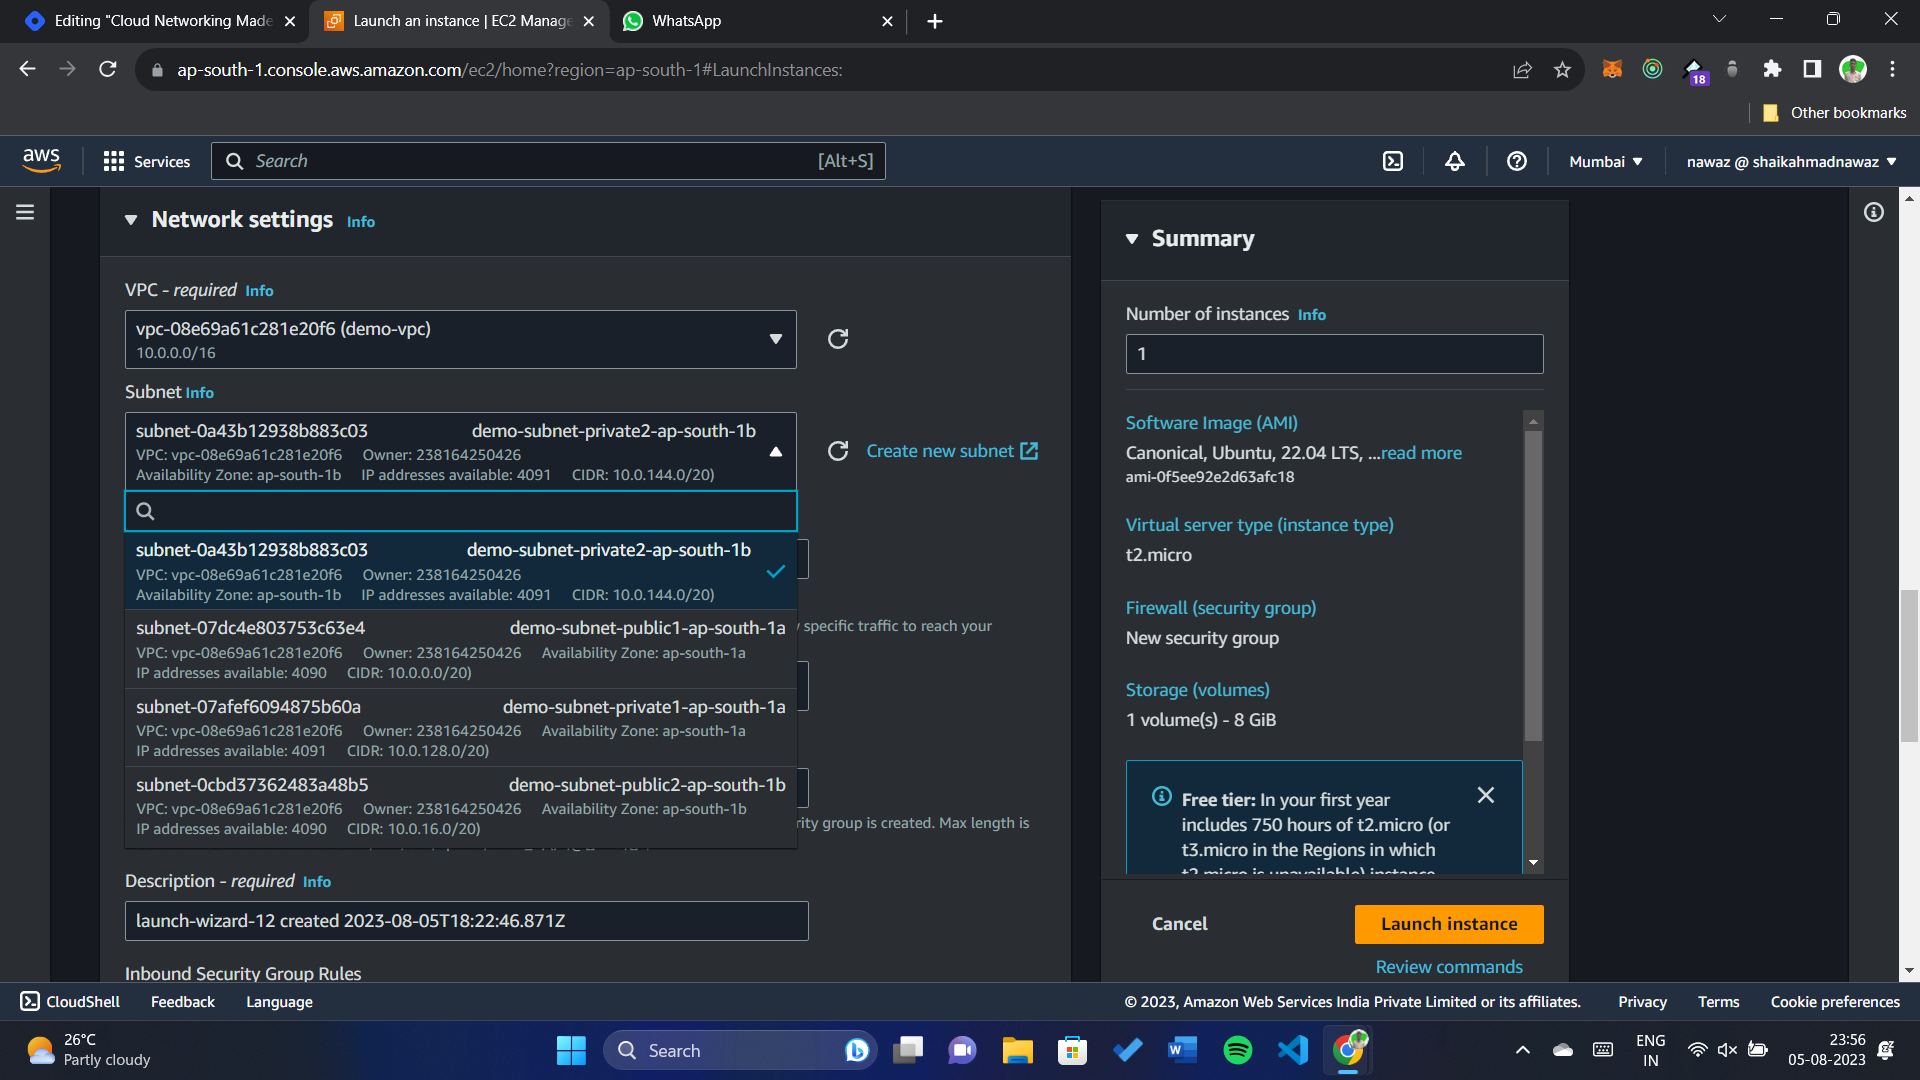
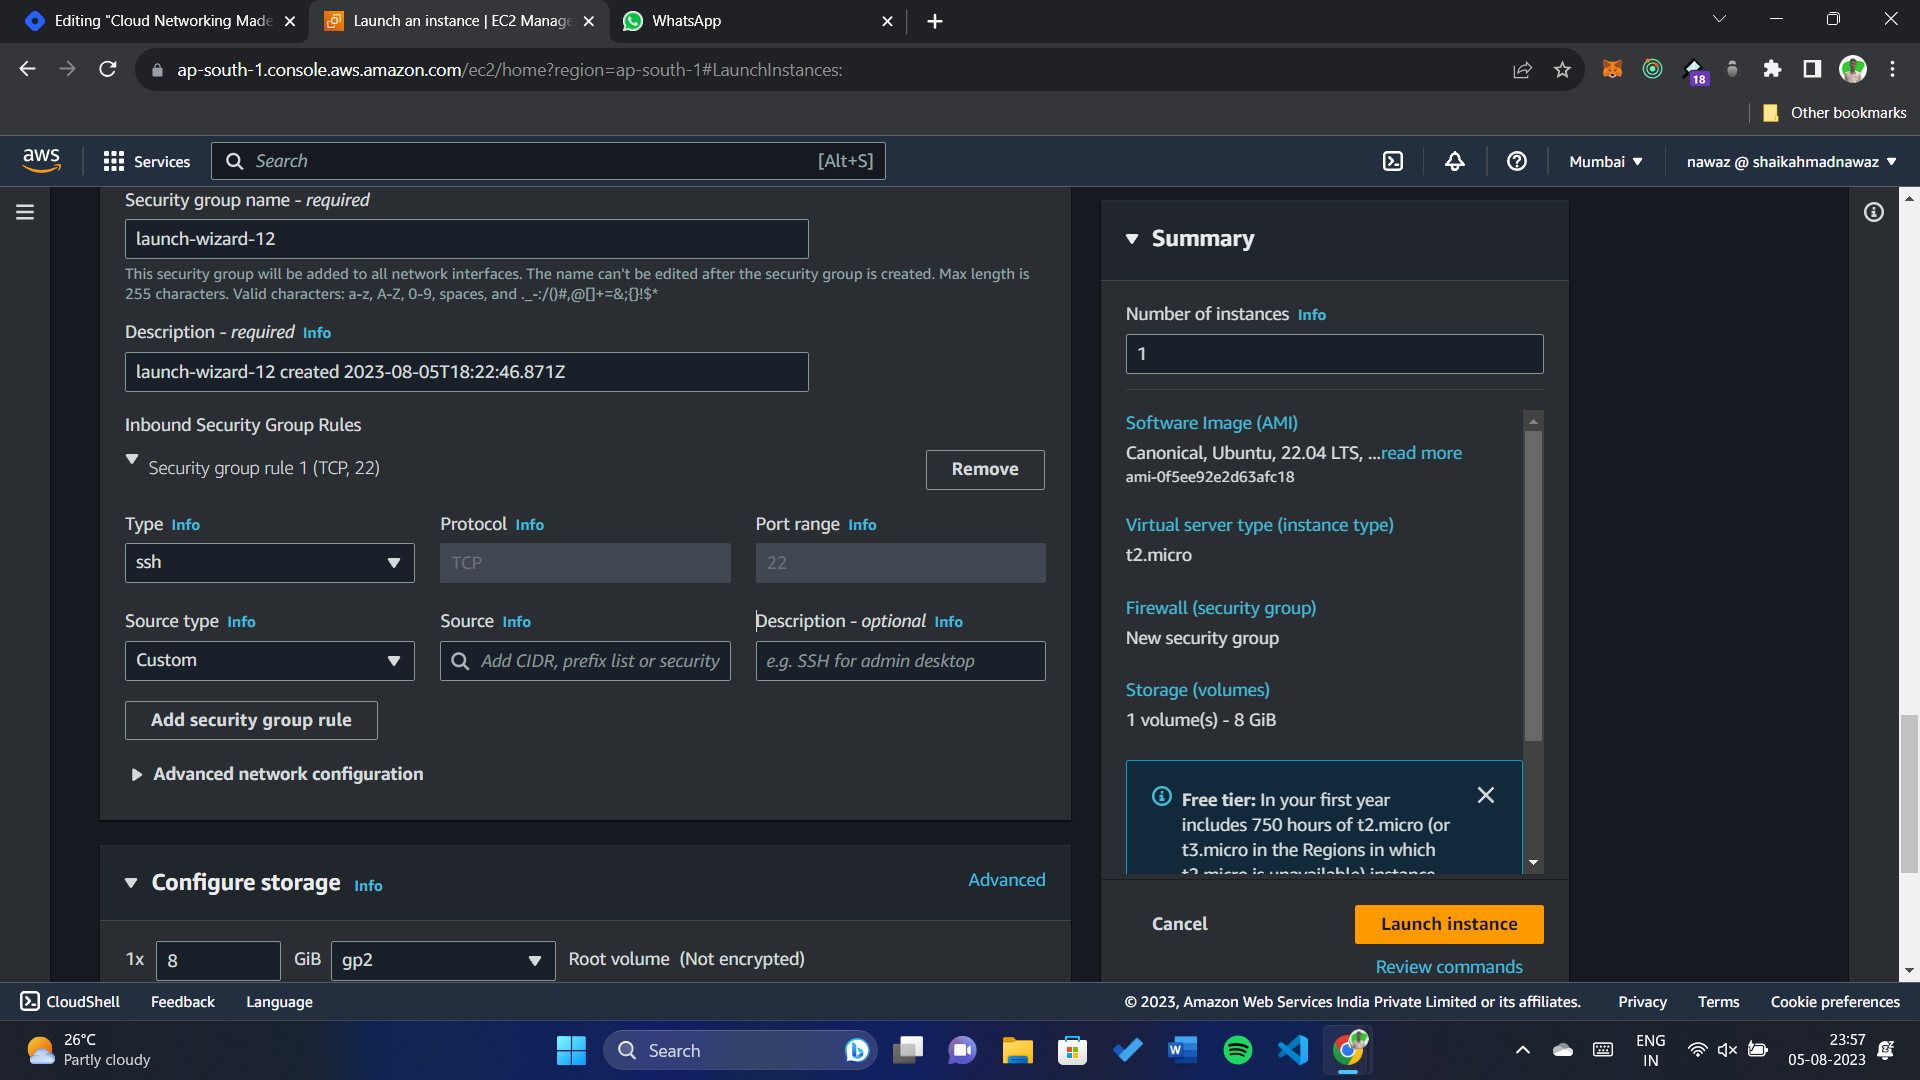
Configure Instance Details: Here, you're specifying where your house will be built. Choose the VPC and subnet where you want to place your EC2 instance. This is where the magic happens – your house will automatically follow the rules you've set for that subnet.
-
Add Storage: Just as houses need rooms, your instance needs storage space. Configure the amount and type of storage you need.
-
Add Tags: Consider this step as putting a nameplate on your house. Tags help you identify and organize your resources.
-
Configure Security Group: Here's where you decide who's allowed to visit your house. Configure the security group to allow specific incoming and outgoing traffic.
-
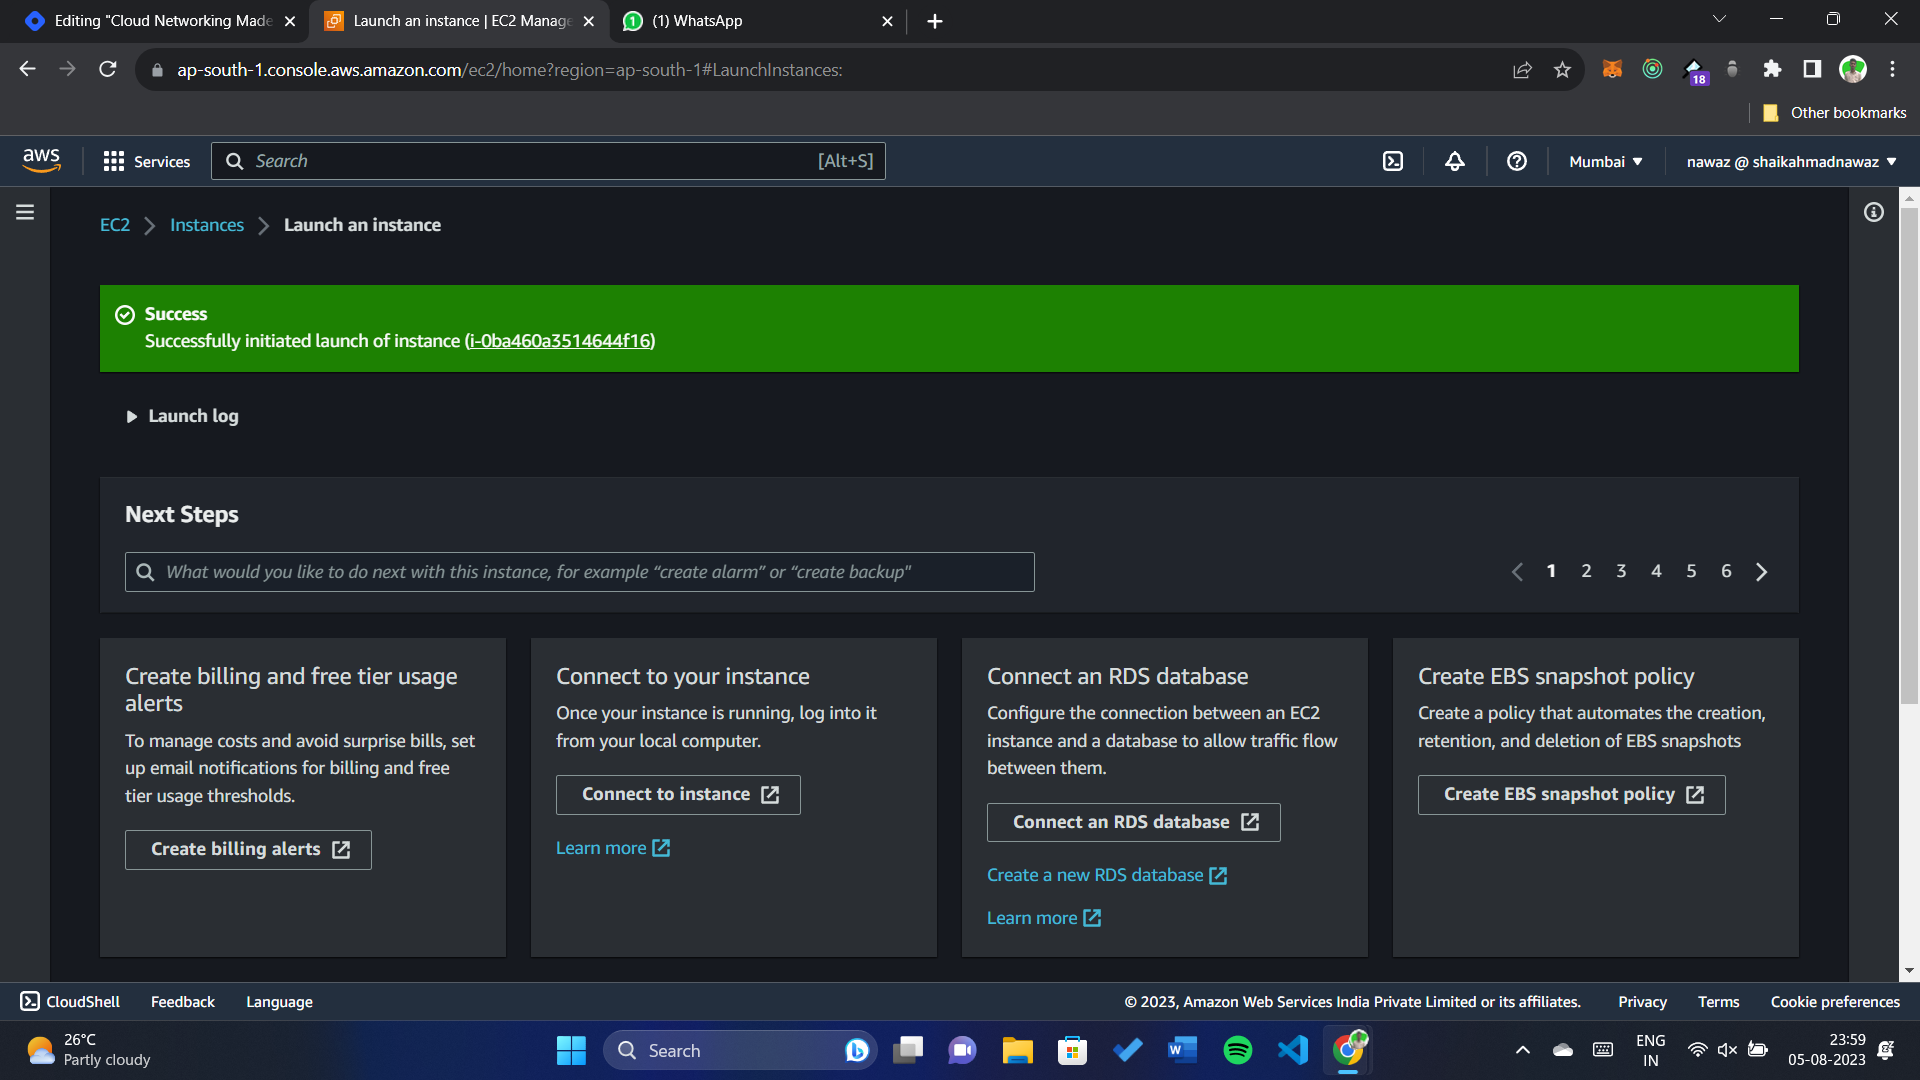
Review and Launch: This is your final inspection before moving in. Double-check your settings and click "Launch" if everything looks good.
Congratulations! You've built and moved into your first house (EC2 instance) in your AWS VPC. It's sitting comfortably in the neighborhood (subnet) you chose, following the rules you've set. You can now access it and use it for various purposes, just like you would with a real house.
AWS VPC might sound complex, but it's your tool for mastering cloud networking. You've learned why it matters – for security, isolation, and customization. You've explored its components – from subnets to gateways. And you've practically built your own town and even moved into your first house using an EC2 instance.
Remember, AWS VPC is your canvas to design and create your cloud environment, with the power to secure and structure your resources your way. As you continue your cloud journey, keep exploring and experimenting with AWS VPC to unlock its full potential.
Now that you have a solid understanding of AWS VPC basics, you're ready to dive deeper and explore the limitless possibilities of cloud networking.
And don't forget to connect with me on social media to stay updated with the latest tips, tutorials, and guides:
- Connect with me on LinkedIn: shaikahmadnawaz
- Follow me on Twitter: shaikahmadnawaz
