-
Notifications
You must be signed in to change notification settings - Fork 8
RNA Seq analysis

To start the analysis, click Run Analysis on the dashboard and then RNA-seq Analysis. After that, follow the step-by-step procedure described through the user interface to setup and start the analysis. Four steps are required:
- Choose type. Here users have to indicate the sample Code, the Analysis Name, the Input Type (FASTQ, BAM, SAM), sequencing strategy (paired-end or single-end), and the Number of threads to be used for the analysis. Sample code is used for further analyses such as the Differential Expression Analysis. Specifically, It identifies the sample during the analysis, therefore, it should be a string without any spaces (only letters, numbers, and dashes). Click Next to proceed with the next step.

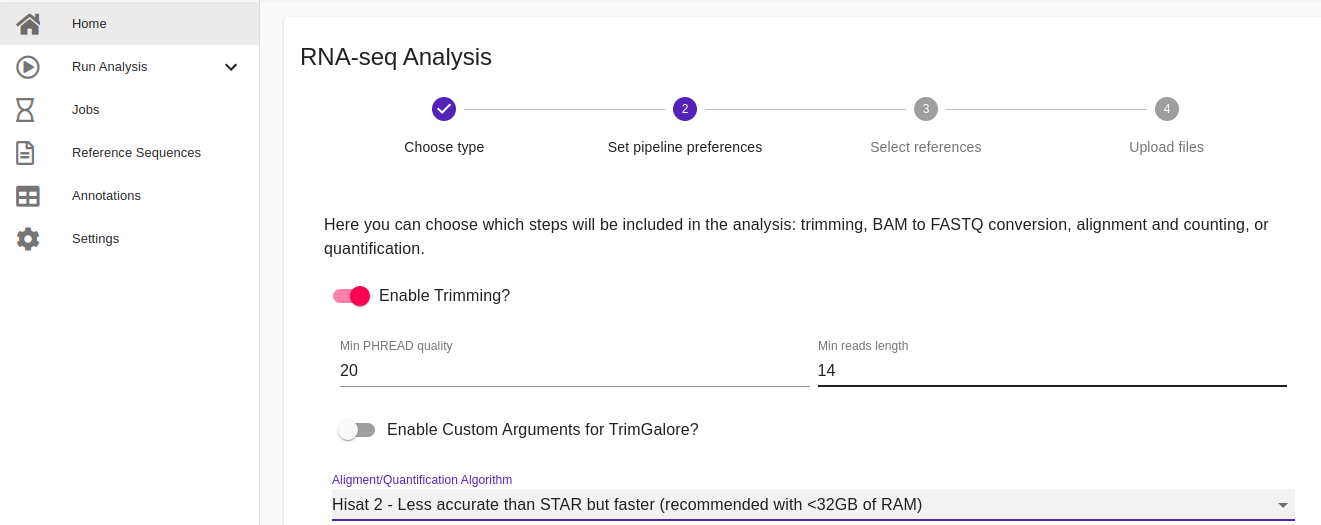
- Set pipeline preferences. Accordingly with the type of the input files, here users can choose which steps will be included in the analysis such as trimming, BAM/SAM to FASTQ conversion, alignment, and quantification. If trimming is enabled, it is possible to indicate the minimum PHRED quality and the minimum reads length for the reads quality filtering. For the alignment step users can choose among Salmon, STAR, and HISAT 2, while for the quantification FeatureCounts, HTseq, and Salmon are available. Once everything has been set, click Next to proceed with the next step.
Note: For the trimming, alignment, and quantification steps more expert users can also enable the opportunity to set all the available parameters implemented by each tool. This feature has been implemented to improve the flexibility of our pipeline giving the chance to users to customize their analyses accordingly their needs. In this case, parameters have to be inserted in a command-line fashion by using a white box that appears in the user interface once users have enabled this option. For more details about the parameters implemented by each tool included in RNAdetector please read the following user guides:
- Trimgalore user guide
- STAR user guide
- HISAT2 user guide
- Salmon user guide
- FeatureCounts user guide
- HTseq-count user guide


- Select references. If STAR or HISAT 2 have been selected for the alignment, at this step users have to select the reference indexed genome and genome annotation file while if Salmon has been selected, the reference indexed transcriptome has to be selected. Reference indexed genomes and transcriptomes can be downloaded from our repository. New ones can be uploaded by using the Reference Sequences section available from our dashboard following the step-by-step procedure detailed in the user interface (read here). Moreover, additional genome annotation files (GTF, BED) can also be uploaded by making use of the Annotation section available on our dashboard and following the step-by-step procedure detailed in the user interface (read here). Once everything has been selected, click Next to proceed with the next step.

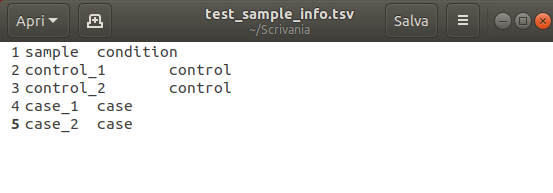
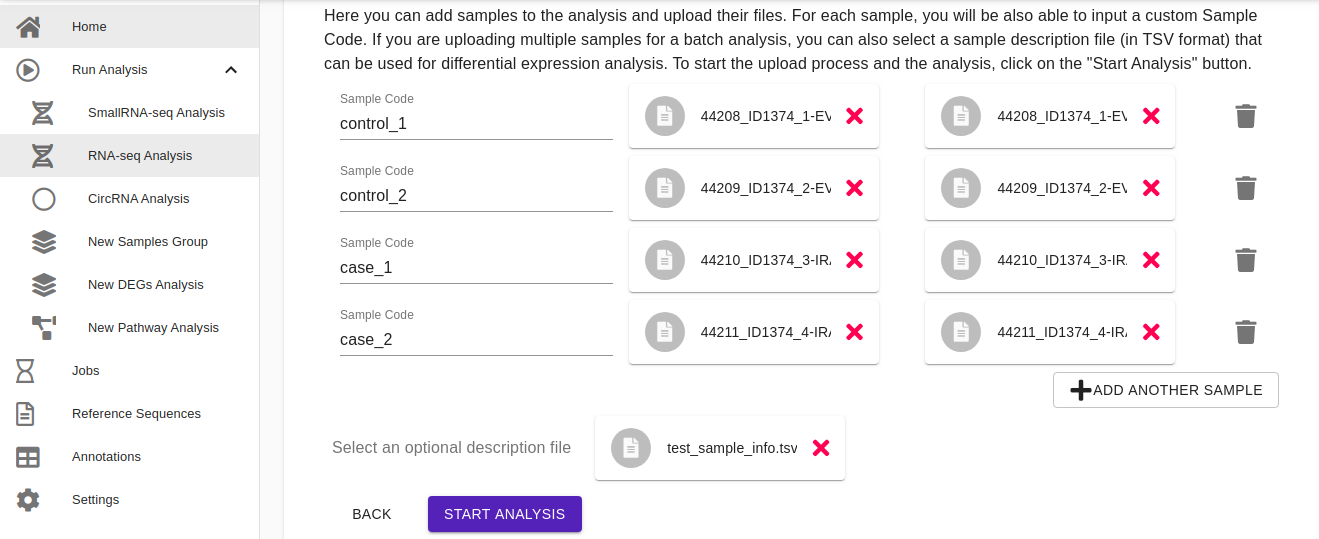
- Upload file. Here users can add samples to the analysis and upload their files. It is possible to upload samples or by clicking add sample icon or by drag-and-drop from your local folder. For each sample, users will be also able to input a custom Sample Code. If users are uploading multiple samples for a batch analysis, they can also upload a sample description file (in TSV format) that can be used for the differential expression analysis (an example of a sample description file is shown in the figure below). Once the samples have been uploaded, click on the Start Analysis button to start the analysis.


